You can find everything you need for the stand at your local hardware supply store. I went to Home Depot and the total cost of the stand was $22.
Supplies...

- 2 inches of wide Velcro
- Cardboard a little larger than size of the form base
- Masking tape
- 1 - 1 inch by 10 feet PVC pipe
Cut into sections: 4 - 4 inch | 1 – 2 1/3 feet | 4 – 8 inch
- 1 - 1 1/4 inch PVC pipe [you only need 2 foot section]
- 1 - 1 1/4 in. PVC Slip x Slip x Slip Tee
- 3 - 1 in. x 1 in. x 1/2 in. PVC S x S x FIPT Tee
- 4 - 1 inch PVC Slip Cap
- 2 - 1-1/4 in. x 1 in. PVC Sch. 40 Pressure Spigot x Slip Bushing
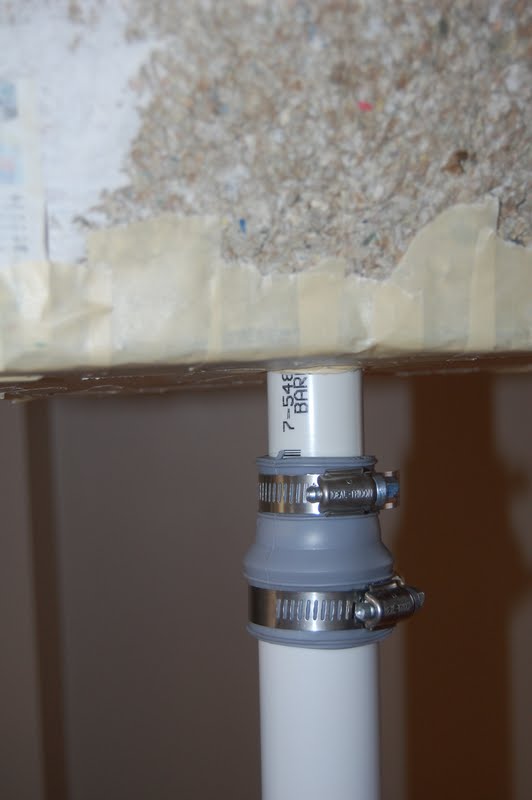
- 1 - Flexible PVC Tubular Drain Connector
- PVC Cement
Attach all the parts together as shown in the image. Use PVC cement to secure them together. Let it dry.


Cut down the arm hole pipes to fit just to the end of the shoulder tip. Inset the PVC tube into the form and insert the arms, making it look like a hanger. Do not cement the arms. Using a hot glue gun, attached Velcro to the shoulder tip and PVC tip where they meet. This will help to keep the form from sliding around on the pipe.


Trace the pipe on the cardboad and cut a hole [1 inch diameter]. Use masking tape to secure the edges of the cardboard so that when the form pivots, the edges do not fray and get destroyed.
Insert the tube with the form and trace around the cardboard, positioning the form so that it is perfectly vertical. [The hole might not be the center of the base, depending on how you stood when the cast was made--you might have to pivot it one way or another.]
Cut out the traced lines, place the cardboard back onto the form and secure it with masking tape all around.


The stand is complete. While not the prettiest, it is as functional and versatile as a professional form stand.

Making the cover for the form coming soon....
Update - 07.16.11...Velcro alone did not do a good enough job of holding the form securely onto the stand. Everytime I went to lift the form by the waist, the the weight of the form was causing the velcro to separate. To rememedy this I predrilled 2 holes through the form and the PVC pipe then secured it with dry walls screws.


